Now that TypeScript has become the de facto standard in frontend development, new projects and third-party libraries are mostly built on its ecosystem. For existing projects, TypeScript can also be applied gradually. Just add the toolchain, and start writing or rewriting part of your application. In this article, I will walk you through the steps of adding TypeScript to a Vue 2 project, since I myself is working on a legacy project, and TypeScript has brought a lot of benefits.
Prerequisites
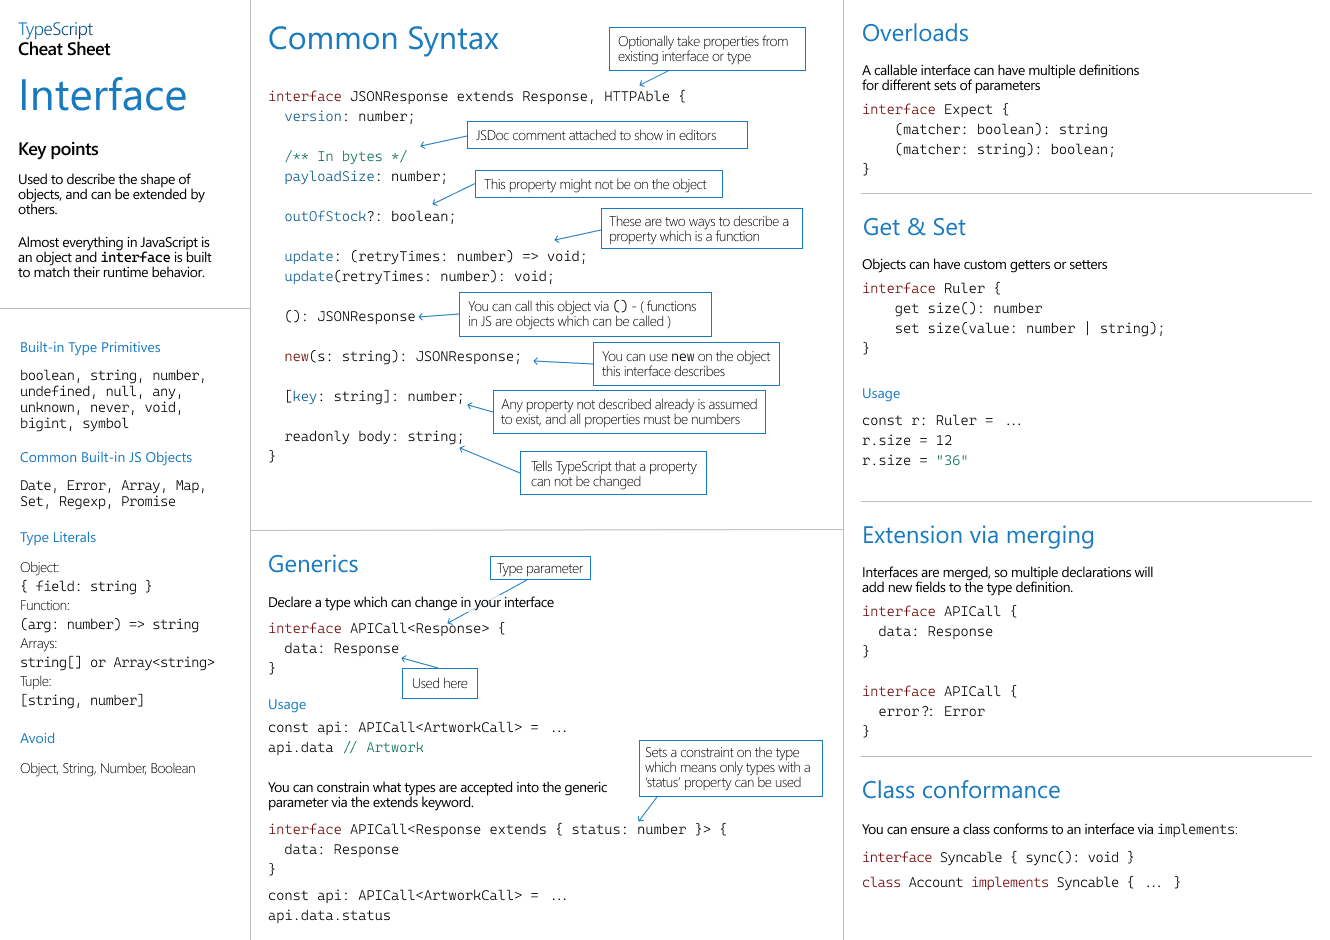
For those who are new to TypeScript, I recommend you read the guide TypeScript for JavaScript Programmers. In short, TypeScript is a superset of JavaScript. It adds type hints to variables, as well as other syntax like class, interface, decorator, and some of them are already merged into ECMAScript. When compiling, TypeScript can do static type check. It will try to infer the variable type as much as possible, or you need to define the type explicitly. Here is the official TypeScript Cheat Sheet.